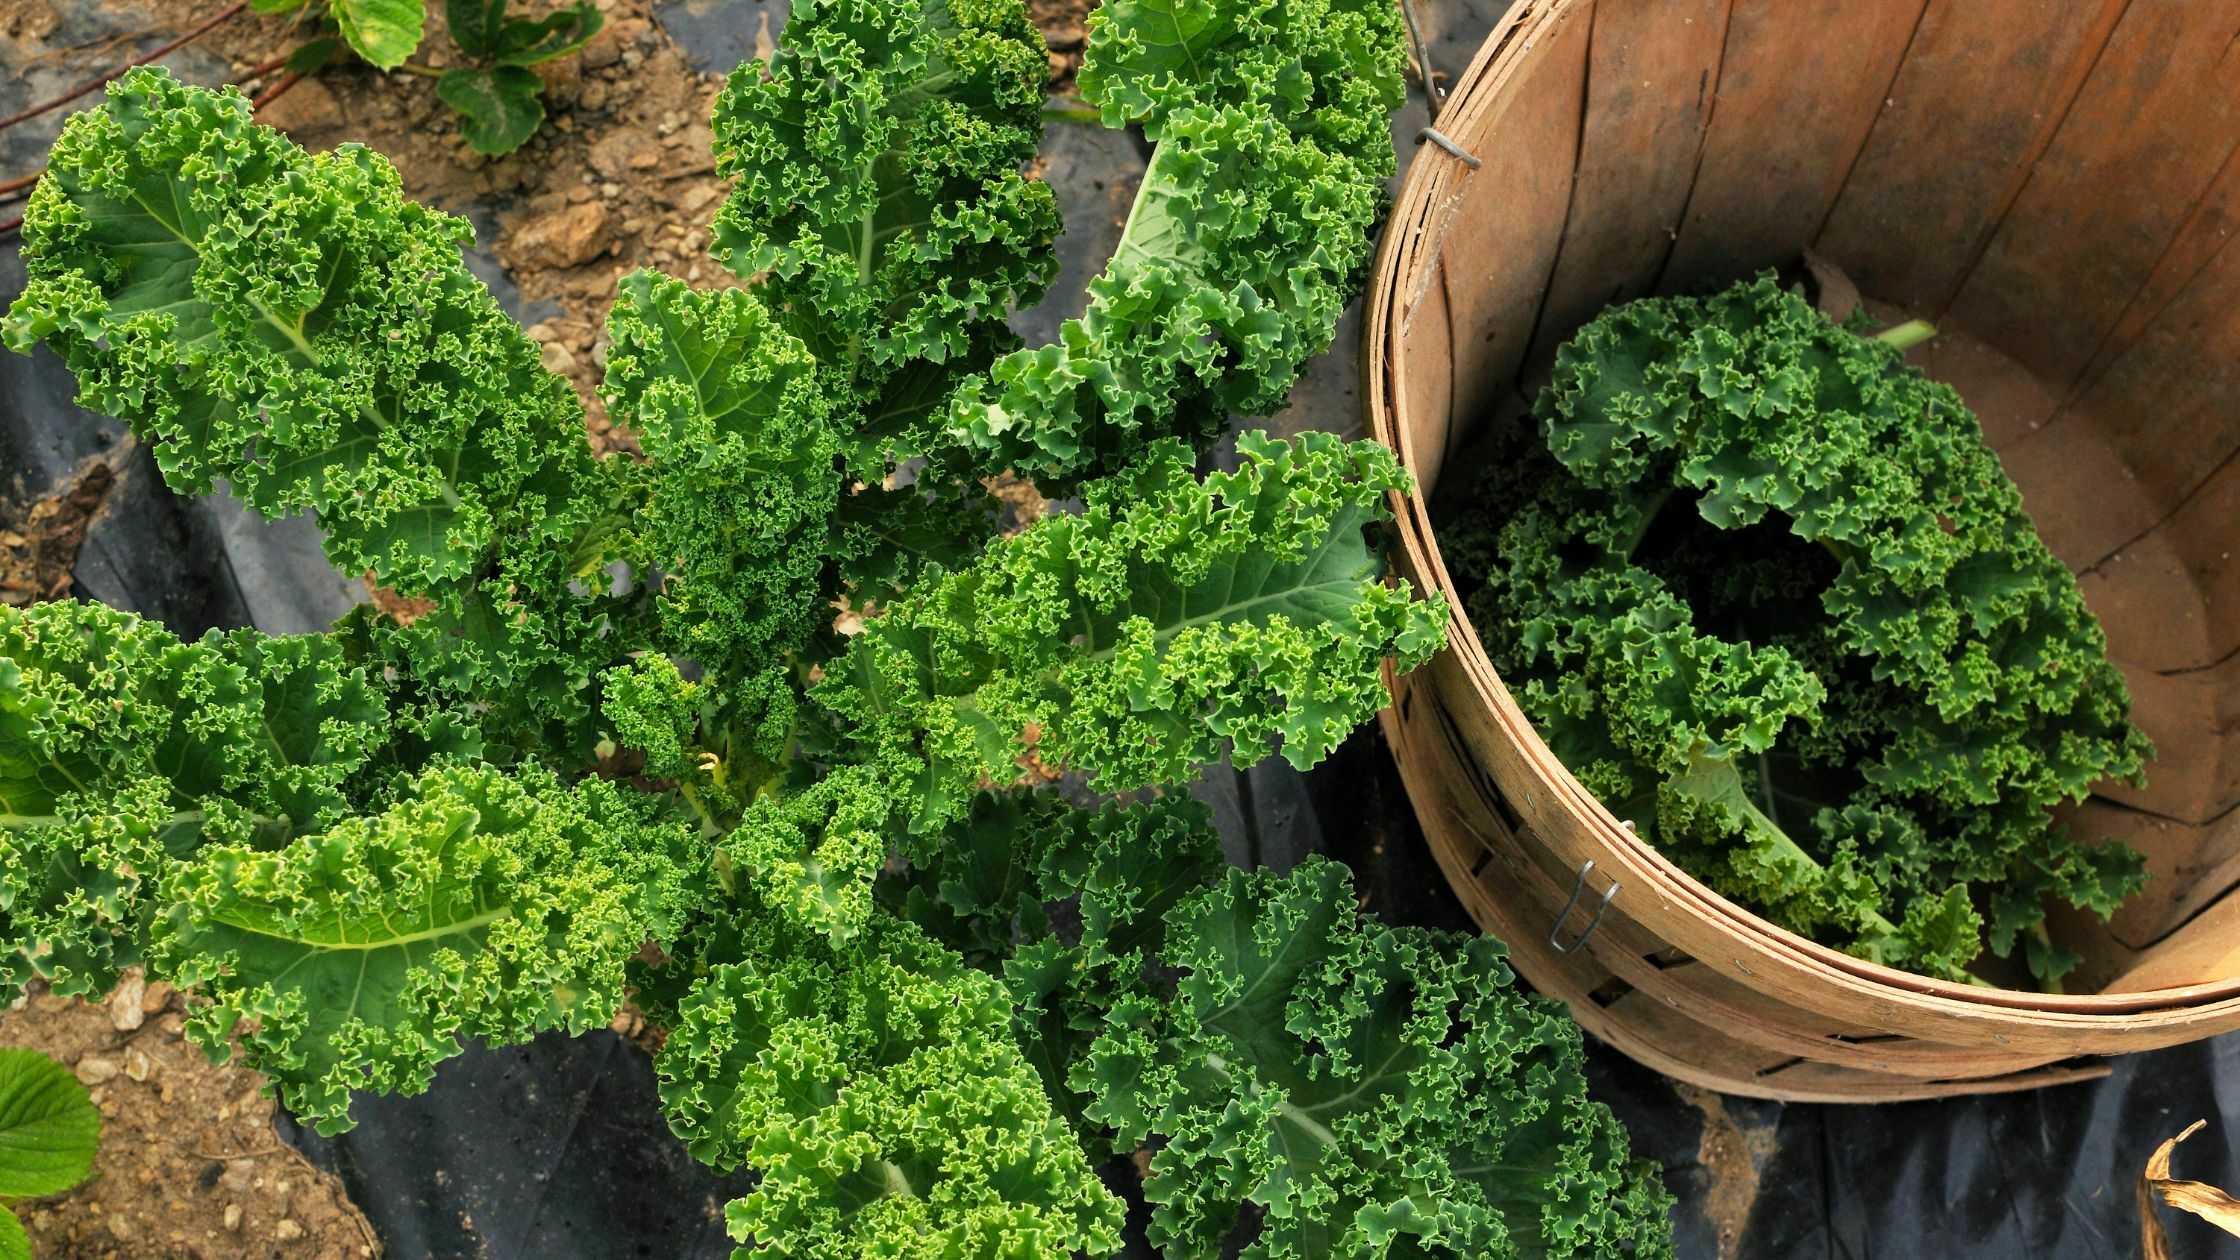
Do you enjoy adding kale to fresh salads or warming stir-fries? We hear you; having your favorite veggies on hand is definitely convenient. That’s why growing your kale is a fantastic idea. To enjoy more delicious recipes from this super healthy and nutritious plant, you should first learn essential steps like harvesting kale correctly.
By learning when and how to harvest kale, you’ll ensure to extend the growth of your crop, so if you have some kale growing in your garden, you may want to prepare to harvest it. As you probably already know, Kale is among the most nutrient-dense foods on the planet. A great source of vitamins, minerals, and antioxidants.
Though it may seem a little intimidating, especially if you are new to growing your food, you have nothing to worry about. Harvesting kale is super easy, fast, and simple. With the following guidelines, you’ll soon be a pro at how to harvest kale so you can get the most out of your plant.
How to Harvest Kale
How To Harvest Mature Leaves
You always want to harvest outer leaves first and leave the inner (and smaller) ones to keep growing.
- Cut off leaves where the leaf stem meets the plant’s main stem.
- You can also snap leaves off the stem by pushing down with your thumb and pulling away from the plant.
- Ensure you don’t cut the main stem off because this will stop plants from producing.
- When you harvest, leave about ⅓ of the leaves intact, so your kale plants can regenerate. Otherwise, you can pick as many leaves as needed.
- It is a good idea to have at least 6-8 kale plants growing at a time so you can pick a few leaves from each daily, depending on your consumption.
Recommended Product: Premium Heavy Duty Shears
[amazon box=”B07K72PHLS” class=”lp-product-list” template=”vertical” image_size=”large” title=” ” image_alt=”alttexthere” description=”none” price=”none” button_text=”Check Latest Price” ]
Made of 3CR14 steel, These Heavy Duty Kitchen Scissors are forged from top premium grade stainless steel that is rust- and corrosion-resistant; ultra-sharp blades are light and effortless while easily outperforming all other shears.
Adapt to a large number of kitchen work, cutting meat; turkey cut poultry bone. In addition to being widely used in the kitchen, it has more uses, such as a nuts cracker, bottle opener, scales scraper with micro-serrated edge for slip-proof cutting, and comfortable, easy-grip handles.
Features:
- Premium quality
- Comfortable
- Safe
- Additional functions
How to plant kale?
- If you’re planting seeds, sow ¼ to ½ inch deep into well-drained, light soil.
- After about two weeks, thin the seedlings to be spaced 8 to 12 inches apart. Kale likes to have plenty of space to stretch out.
- If you’re setting out young plants (transplants), plant them at the depth they are growing in the container.
- Space 18 to 24 inches apart. After planting, water the plants well.
How to care for kale?
- It’s important to keep kale well-watered and fed. If rain is inconsistent, provide 1 to 1.5 inches of water each week, approximately 1 gallon per square foot.
- Regularly feed kale with continuous-release plant food.
- Mulch the soil to keep the weeds and kale cool, as kale won’t grow in hot weather.
- You can also offer your kale plants shade in the late afternoon to help keep them cool.
What are some kale varieties?
- Vates. It is a hardy variety with curly, blue-green leaves.
- Winterbor. It resembles the ‘Vates’ variety but is frost tolerant.
- Red Russian. It has red, tender leaves and is an early crop.
Recommended Product: Dwarf Siberian Improved Kale Seed
[amazon box=”B07Y5STMXK” class=”lp-product-list” template=”vertical” image_size=”large” title=” ” image_alt=”alttexthere” description=”none” price=”none” button_text=”Check Latest Price” ]
This Russian variety keeps on producing long after other kales have bolted. Flavorful green leaves have curly frilled edges.
A carefully selected variety that grows well planted outdoors in the spring or fall. It could also be grown indoors if given sufficient light.
Try it as a tasty addition to salads, soups, or breakfast bowls.
Features:
- Non-GMO
- Russian variety
- Spring or fall
Will kale grow back after cutting?
If you harvest kale correctly, the plant will continue to grow and produce leaves. If you cut the plant off at the top or harvest the smaller leaves growing in the center, you will likely kill the plant. It would help if you left that center area at the top of the stem for the plant to keep on producing.
How do you know when kale is ready to pick?
Kale is ready to harvest when the leaves are about the size of your hand. Pick about one fistful of leaves per harvest. Start harvesting the oldest leaves first from the lowest section of the plant. Make sure you discard any yellowed or torn leaves.
What to do with kale after picking?
- You can choose to stem, slice, or tear the leaves, rinse them, dry them well in a salad spinner or with kitchen towels, and store the leaves, wrapped in a paper towel in a zip-top plastic bag, for up to 3 days.
- Remove the kale stems with a knife (or your hands before blanching and freezing.
Does kale come back every year?
Kale is a biennial that many people grow as an annual. Some varieties of kale are perennial plants that come back year after year.
How to store kale leaves?
- Freshly picked leaves can last for 2-3 weeks in the refrigerator if you get them in the fridge right away.
- Take bunches of kale and wrap them loosely in slightly damp paper towels.
- Put each bunch in a plastic bag to keep the produce fresh.
Can kale be frozen?
You can also freeze kale for longer storage.
The leaves can be washed, chopped, and frozen but will only last 4-6 weeks in the freezer before turning bitter. Blanch it before freezing to keep kale tasty for up to a year.
- To blanch kale, first, wash and chop the leaves.
- Prepare a bowl of ice water while you boil a pot on the stove.
- Place the kale in the boiling water bath for two 1/2″ minutes.
- Transfer the kale to the ice bath.
- Drain the leaves as best you can and get rid of excess water with a towel.
- You can now freeze your blanched kale in portions and store it for 8-12 months.
How To Harvest Baby Kale
- Remove by using your fingers to pinch off individual leaves at the base of the stem.
- You can cut the stems with scissors or a knife.
- Grab a handful and cut them off one to two inches above the ground using a knife.
- This quick process allows the plant to continue growing for future harvests.
- When choosing where to cut, consider the growth point. This is the central portion of the plant on a kale plant where stems converge and new growth emerges.
- To allow new growth, cut the stems above the growth point. Cut just below where the stem connects to the larger leaves to do this.
Recommended Product: Fiskars Big Grip Garden Knife
[amazon box=”B000F95CZY” class=”lp-product-list” template=”vertical” image_size=”large” title=” ” image_alt=”alttexthere” description=”none” price=”none” button_text=”Check Latest Price” ]
The Big Grip Garden Knife reduces hand fatigue, whether slicing through sod, digging out dandelions, opening bags of soil, planting, or transplanting.
An extra-large handle with a soft-molded grip provides excellent control and comfort, and the cast aluminum head resists rust and won’t snap off while digging.
A sharpened blade with a serrated edge makes digging tough soil easy. Additionally, the handle features a hang hole for convenient storage.
Features:
- 0.6 Pounds
- Stainless Steel
Additional tips on How to Harvest Kale
- Kale is an easy plant to harvest from. You can cut off individual leaves without harming your plants if you don’t cut the central bud.
- Please do not place your kale in the fridge without protection; it will wilt quickly. It would help if you also didn’t wash your leaves before placing them in the fridge. If they’re not completely dried, the excess moisture can make them go bad more quickly.
- If you see discolored or heavily insect-eaten leaves, remove them and discard them or add them to the compost pile.
- You can usually start to harvest baby-sized kale leaves about 25 days after planting the seeds.


