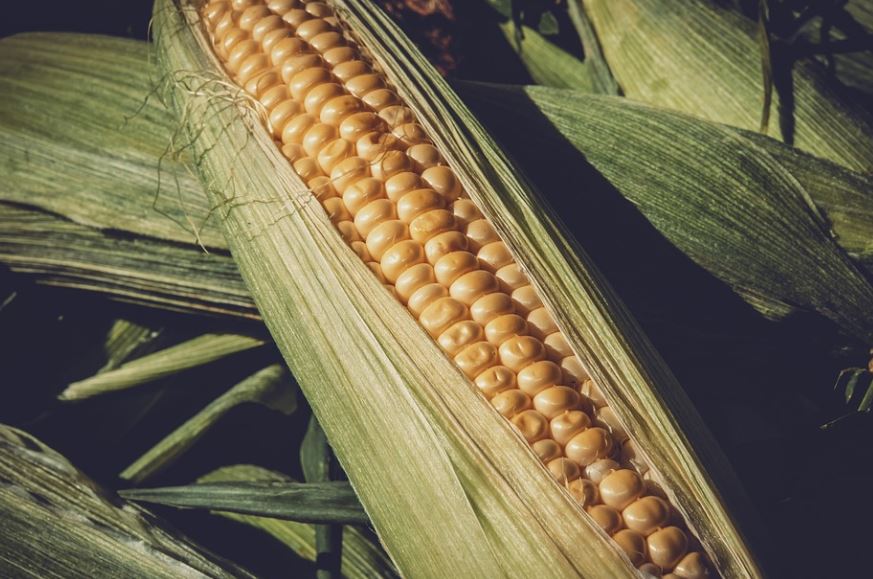
If you are into growing your food, then you may consider growing your own corn for all your corn needs.
Part of the growing process would also imply you should learn how to harvest corn properly.
Today, we’ll be sharing with you exactly that; how to harvest corn and more essential tips.
Did you know that corn and other grains are actually much more accessible to grow than most fruits and vegetables?
Despite general belief, you do not need acres and acres to produce corn. Actually, the size of an average backyard would do.
And though it may seem to sound a little intimidating at first, especially if you are new to growing your food, you have nothing to worry about.
Harvesting corn is a relatively simple process. With the right guide and equipment, you’ll soon become a pro at how to harvest corn right at home.
How to Harvest Corn
- Grasp the ear firmly and pull down, then twist and pull. It usually comes off the stalk easily.
- Harvest Corn only as much as you can eat in a day for the first few days, but make sure you harvest the entire crop while in the milky stage.
- Pull up the corn stalks immediately after harvest. Cut the stalks into 1-foot (30 cm.) lengths before adding them to the compost pile to hasten their decay.
Additional Tips on How to Harvest Corn
 Pin
Pin- Corn is best when you harvest it early in the morning.
- Sugary varieties begin to lose their sweetness soon after harvesting, so use them as quickly as possible.
- Prepare for eating or preserving immediately after picking.
- Harvest Corn when tassels begin to turn brown and cobs start to swell. Kernels should be full and milky.
- Pull ears downward and twist to take off the stalk.
How to Harvest Corn FAQs
How to plant corn?
- Sow seeds about 1 inch deep and 4 to 6 inches apart in each row.
- Rows should be spaced 30 to 36 inches apart.
- You may choose to fertilize at planting time; corn is meant to grow rapidly. This can be skipped if you are confident that the soil is adequate.
- Water well at planting time.
How to care for corn?
- When the young corn plants are 3 to 4 inches tall, thin them to be 8 to 12 inches apart in a row.
- Be careful not to damage the roots when weeding.
- Keep corn well watered, as it has shallow roots and can become stressed by drought. An inch of rainfall per week is sufficient; water more if conditions are especially hot or if your soil is sandy.
- Mulch helps reduce evaporation.
How do you know corn is ready to pick?
- Knowing when to pick corn is one of the most important factors for a quality crop. Corn is ready for harvest about 20 days after the silk first appears. At harvest time, the silk turns brown, but the husks are still green.
- Each stalk should have at least one ear near the top. When conditions are right, you may get another ear lower down on the stalk.
- The lower ears are usually smaller and mature a little later than the ones at the top of the stalk.
- Before you begin picking the corn, make sure it is in the milk stage.
- Puncture a kernel and look for the milky liquid inside. If it’s clear, the kernels aren’t quite ready. If there is no liquid, you’ve waited too long.
Does corn regrow after harvest?
When hail damages young corn plants, they usually regrow if the growing point remains healthy. In corn, the growing point remains protected below the soil surface until the V5 stage (five collared leaves). These plants will not recover, so count them dead.
How do farmers harvest sweet corn?
A combine harvester, or combine, is the tool of choice for harvesting corn and other grains. This piece of equipment is called a combine because it combines several jobs into a single machine. Combines cut the crop and separated the grain from the plant while processing and spreading the remaining material over the field.
- At the front of a combine is the corn head. Combines can switch between a variety of heads depending on the type of crop harvested.
- What takes place is a pair of spinning rolls pull the corn stalks down through the head. Just above those rolls, metal plates pop the ear off the stalk. Gathering chains push the ears to the back of the head, where an auger funnels the ears to the center of the head and into the front of the combine to begin the grain-separating process.
- About 10 seconds after the head takes in the ears, and there will be clean, separated grain in the tank. In this short period, a lot of activity happens inside the machine. Once the whole corn ears enter the combine, they are introduced to a spinning rotor that threshes the grain from the cob. The machine does this mechanically, and grain-on-grain threshing as the material is flung around the rotor.
- After the rotor, a series of cleaning mechanisms come into play. Once the corn is clean, it enters the clean grain elevator, where it is transported up into the grain tank, where it can be held until the tank is full.
How do you harvest corn without killing the plant?
Hold the stalk in your non-dominant hand to steady it and, with your dominant hand, twist the ear once to the side. Pull the ear downward and yank it off of the stalk, placing your freshly-picked corn in a bucket or pile. Pulling on the cornstalk without twisting can kill the plant.
How to store corn?
The best method of storing freshly picked corn is in the refrigerator, where it keeps for up to a week. If you need to keep it longer, it’s best to freeze it. You can also store corn for a year in a can.
Storing corn in the refrigerator
You can store sweet corn in the fridge for 2-4 days by wrapping unopened husks in damp paper towels.
Recommended Product Brawny Tear-A-Square Paper Towels
[amazon box=”B07MB9XLW9″ class=”lp-product-list” template=”vertical” image_size=”large” title=” ” image_alt=”alttexthere” description=”none” price=”none” button_text=”Check Latest Price” ]
Brawny Tear-A-Square paper towels offer multiple options for you to choose from—all featuring the same strength and durability you’ve come to expect from Brawny.
Gone is the guilt of using a full or half-sheet paper towel when only a quarter sheet is needed. Use Brawny Tear-A-Square as a coaster or napkin for quick clean-ups or to wipe up small spills.
Use a quarter-size sheet when you need a smaller sheet-size option with the same durability and strength you’ve come to expect from Brawny.
Features:
- Quarter, Half, & Full
- Strong
- Absorbent
- Durable
Storing corn in the freezer
Blanch your corn in boiling water, put your corn cobs in an airtight container and store it in the freezer.
Freeze your corn for up to 6-8 months to have fresh-tasting corn no matter the season.
You can also cut the kernels off of the cob with a knife before freezing for compact storage.
Recommended Product: Rubbermaid Food Storage
[amazon box=”B07WZPV3FQ” class=”lp-product-list” template=”vertical” image_size=”large” title=” ” image_alt=”alttexthere” description=”none” price=”none” button_text=”Check Latest Price” ]
Easily store food, minimize clutter around your kitchen, and stop your search for the perfect meal prep containers with these Easy Find Vented Lids Food Storage Containers.
Say goodbye to unwanted splatters, messy microwaves, and time-consuming clean-ups with built-in vents on each lid. The bright red lids snap to each other and the bottom of the containers, so they’re always easy to find and organize.
Constructed from durable, BPA-free plastic, these food containers are built to withstand a wide range of temperatures and are top-rack dishwasher-, microwave-, and freezer-safe.
Features:
- Rubberized seal keeps food fresh
- Prevents leaks
- Perfect for food storage, leftovers, and more
- Great for meal prep
Storing corn in a can
If you don’t plan on cooking your corn 2-4 days after harvesting, blanch your corn and remove the kernels with a sharp knife.
Store the kernels in a jar and place them in a pressure canner to seal the jar.
Canned corn tends to last longer than frozen corn at around 3-5 years
Recommended Product: T-fal Pressure Cooker, Pressure Canner
[amazon box=”B01KWZEERC” class=”lp-product-list” template=”vertical” image_size=”large” title=” ” image_alt=”alttexthere” description=”none” price=”none” button_text=”Check Latest Price” ]
The stovetop canner’s heavy-gauge aluminum construction heats quickly and offers rustproof performance for long-lasting use.
For added safety, the cooker’s backup steam release components include a reusable overpressure plug (the red pin in the center pushes out, releasing steam). The gasket-release window will push out from the lid opening if more release is needed.
In addition, a spring safety device prevents the pressurization of the cooker before being securely closed, and a sure-locking lid system prevents opening the lid when the range is pressurized.
Features:
- Aluminum
- Cooking racks
- 5 Point Security System


